'Wow, what a name!!!' you may have thought, THE BANDONEONIST. I discovered the name just a few days ago but after learning what it is I have come to love it. That is why I have chosen it as the title of this post.
The bandoneon is a kind of small accordion that was born in Germany. Later it was taken to the Rio de la Plata region in South America. From there, it spread all over the area, specially in Argentina and Uruguay. It has become a symbol of the tango. In this link from
wikipedia you can read the history of this beautiful instrument.
I have used the bandoneon for the fifth music in my Jazz Band. Here he is:
He is a think, fatty, sad and angry faced dwarf. Maybe, the grumpy dwarf of the Band. Let us see his history:
It all starts in Zaragoza back in 2013, visiting the amazing Eric Joisel's Exhibition. There I discovered the bandoneonist for the first time. The thing that really caught my eye was the instrument. The way the bellows are folded is simply astonishing. Take a look at Joisel's fold:.
 |
| Bandoneonist in Joisel's Exhibition in Zaragoza 2013 |
Coming to fold this model was very straightforward, specially compared with previous models. Both, dwarf and instrument CPs where published and available in Internet. For the dwarf, I used Ricardo Montecinos' 'Dwarf with Skirt' CP. You can find it in his
web page. As in my previous dwarves I have replaced Ricardo's CP head pattern with the 'tradicional' pattern to ease the collapsing process. The final CP I used is this:
 |
| Dwarf with Skirt CP |
In the same web page, you can find a great
photodiagram that helps to collapse the model.
For this dwarf I have used Kozo paper as always. The square is 65x65 cm, the largest possible size from the sheet of paper I had. You can see now some photos of the folding process:
 |
| Collapsed model |
If you analyse the base you can see it is quite flat and wide. At this point you have start to model the body trying to make it more like a cylinder. In my case I also wanted to keep it wide so that the final appearance of the dwarf was a little bit fat.
Closing the back of the model is very straight forward if you have already folded the 'traditional' dwarf. It follows the same technique. You can see it in my post about
THE CLARINETIST.
 |
| Back of the model once closed |
 |
| Shaping the left side |
Together with the rounding process you can shape the skirt.
Finally you have to dampen the model and harden it with methylcellulose or carpenter's glue. Then you have to let it dry.
In the previous photograph you can see how the legs come from the back side. You have to fold them forward and strenghten them with glue so that they can support the weight of the model.
Some more modelling and it is done:
The instrument, a bandoneon, it a little origami jewel. A handmade CP draft was released by Joisel himself::
Later on, Ricardo Montecinos redrawed the CP with the computer. You can see it in his
web page:
My investigation also took me to the wonderful "
Setting the Crease" blog by Australian Peter Whitehouse (Wonko). It has more than 400 entries, most of them belonging to his wondrous 365 Project. He folded a different model every single day of the year 2011. And not easy ones, just hold your breath and take a look. In one of his
entries he has a photodiagram on how to fold this model. It seems he also fell in love with it as I did.
I started from a 32x20 grid, kozo paper. Size of the paper 20x12,5 cm. I painted it with brown water colour. Here are some photos of the folding process:
 |
| The draft I made with the grid |
 |
| First I precreased the CP except in the central area. There, I only precreased the horizontal and vertical lines. The triangles and diamonds are more easily folded later. |
 |
| Detail of the collapsing of one of the horizontal lines in the middle of the CP and how you start to create the sides |
 |
| The same point but from the inside |
 |
| After collapsing the main body |
We begin to precrease the lines that in the centre of the CP appear as triangles and diamonds. They will let us fold the bellows. After folding the horizontal lines in the CP the complex triangles and diamonds turn into easy to fold straight lines.
 |
| Precreasing the bellows |
 |
| After precreasing the bellows |
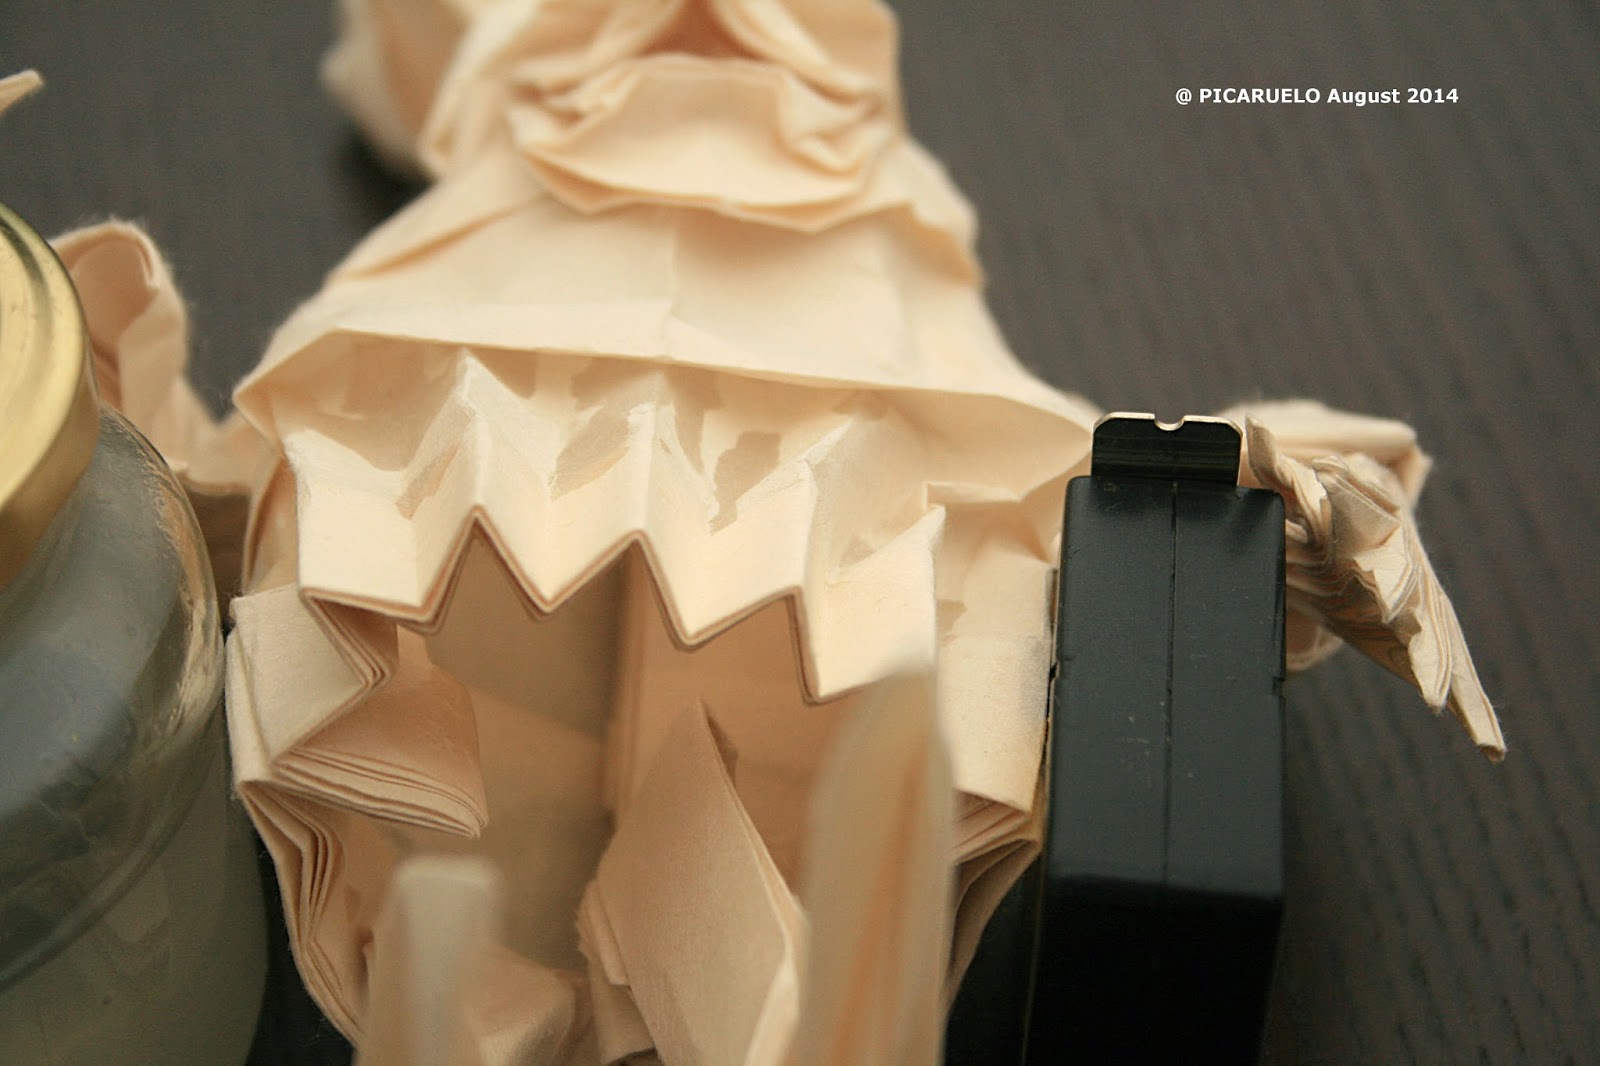
And now we begin with the most surprising and pleasant part, the bellows folding. They almost fold themselves once the creases are made
 |
| The belows almost fold themselves |
 |
| When the belows are made the model closes on itself |
 |
| Finally we fold both sides |
 |
| And we arrive to the finished model |
 |
| The final model is not perfectly closed . We can help it with a little carpenter's glue or methylcellulose. The purists can try to close it simply with wet folding techniques. |
 |
| Detail of the handle |
And in the end we place the bandoneon in its place between the dwarf's hands. As you can see I have added a few gilded dots around the sides of the model to make it more lively. They are painted with deep gold acrylic.
 |
| Bandoneon detail |
Finally, a little origami lesson I learnt from Joisel seeing his models in the Zaragoza 2013 Exhibition.
 |
| Eric Joisel's hedgehog in Zaragoza 2013 Exhibition |
 |
| Eric Joisel's snail in Zaragoza 2013 Exhibition |
Both, hedgehog and snail, two amazing models use the same pattern than the bandoneon. The lesson is clear. Simple patterns, used once and again, to solve very complex and different problems.