Saturday, 25 October 2014

THE BASS PLAYER

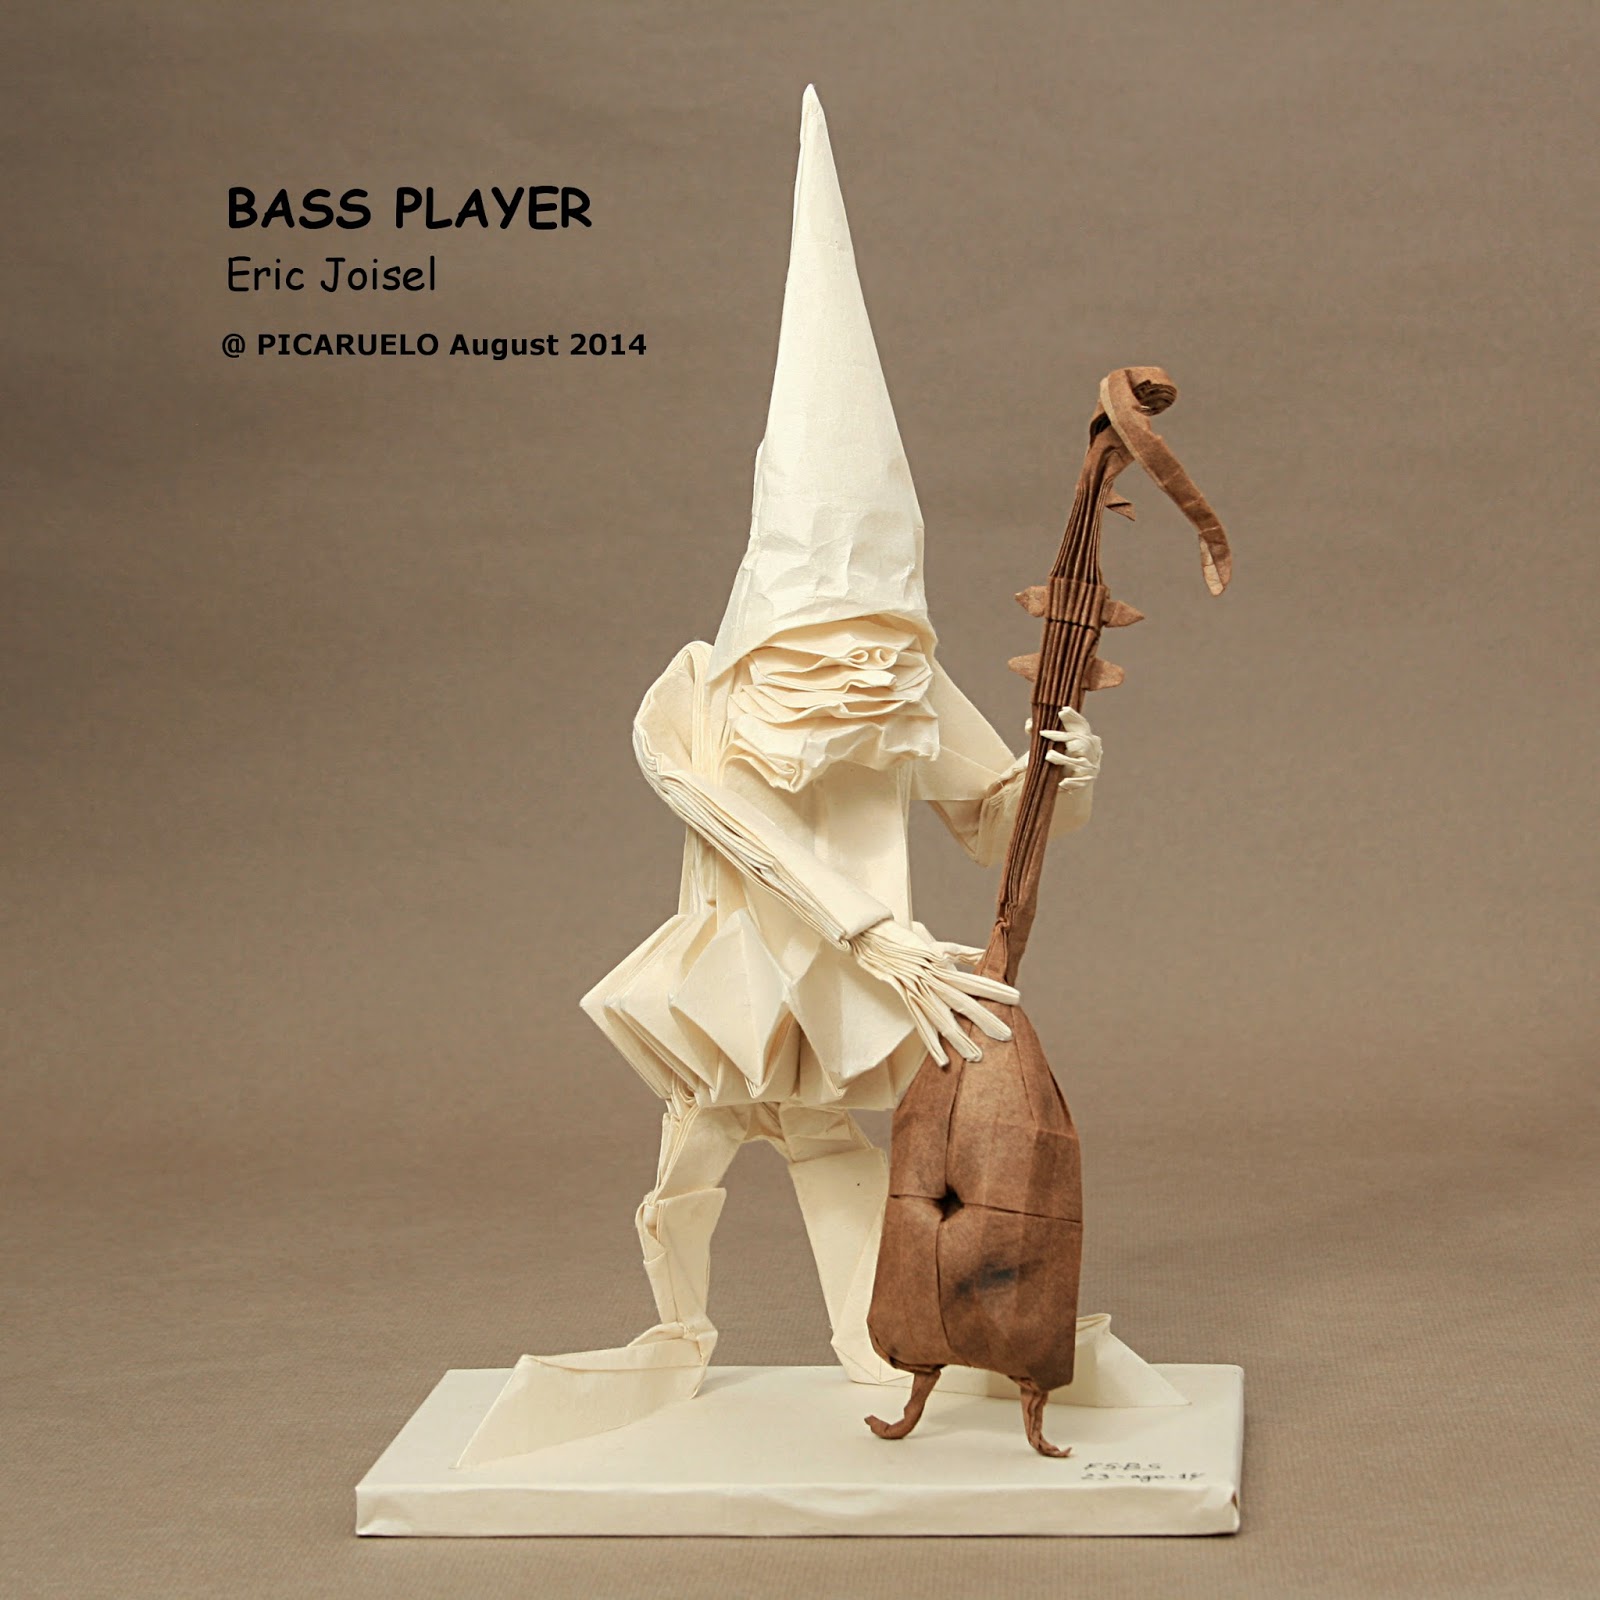
The seventh dwarf in my Music Band is the tallest with his very long hat. Besides, he has the biggest instrument until now. He is standing straight, gently touching the bass strings. He is here:

And here you have Joisel's bass player in the Zaragoza Exhibition in 2013:
Joisel's bass player in the Zaragoza Exhibition in 2013
The model is folded from the same base than the violinist that I already presented in this blog, the dwarf with diamonds:

In this case I have used a slightly bigger paper, the maximum I could get from the piece of Kozo paper I had: 64x64cm. The total height of the model is 27 cm. I have used a long vertical hat to make it as tall as possible so that it looks over the instrument. Compared to the violinist the model is much more slender. Together with the long hat, I used long legs. Note how I used smaller feet than in the violinist and no knees at all to lengthen the legs. They are small details that make two similar models look very different.

The instrument, a bass, is difficult to classify. A bass may refer to different instruments, none of them exactly the same as the origami model I have folded. However, the similarities with Joisel's bass and the beauty of the model made me select it for my musician.

In the following images from Wikipedia you can see some of the instruments that are called basses. I like to imagine the origami model like a mixture between the bass violin or cello and the acoustic bass guitar:

Acoustic bass guitar

Bass guitar
Bass violin

In the origami world there have already been several bass designs. I have found three related to Joisel's model:

The first one, with very little documentation appears in the Spanish Origami Association (AEP) forum:
Photograph published by 'zenutrio' in the AEP forum

CP draft showing the bass body (it doesn't appear in the forum any more but I think it matches the previous model)
The second one is the model designed and released by Ricardo Montecinos in his flickr page:
And the third one, my option, has been designed and published by Alexander Kurth. Alexander is a very talented young german origami artist. Here are some links to his flickr,  Facebook and Youtube channel. Enjoy his creations. In his Youtube channel he has a videodiagram showing step by step how to fold the bass:


I have drawn his bass CP to illustrate the design:


It is a 3x1 box pleating design. It uses a 48x16 grid. The body is on the left and the arm on the right. I folded my model from a 41x13.3 cm kozo paper painted with brown water colour. The most beautiful part of this model is probably the central hole in the body. You can see the detail in the model I folded:

Back
Front
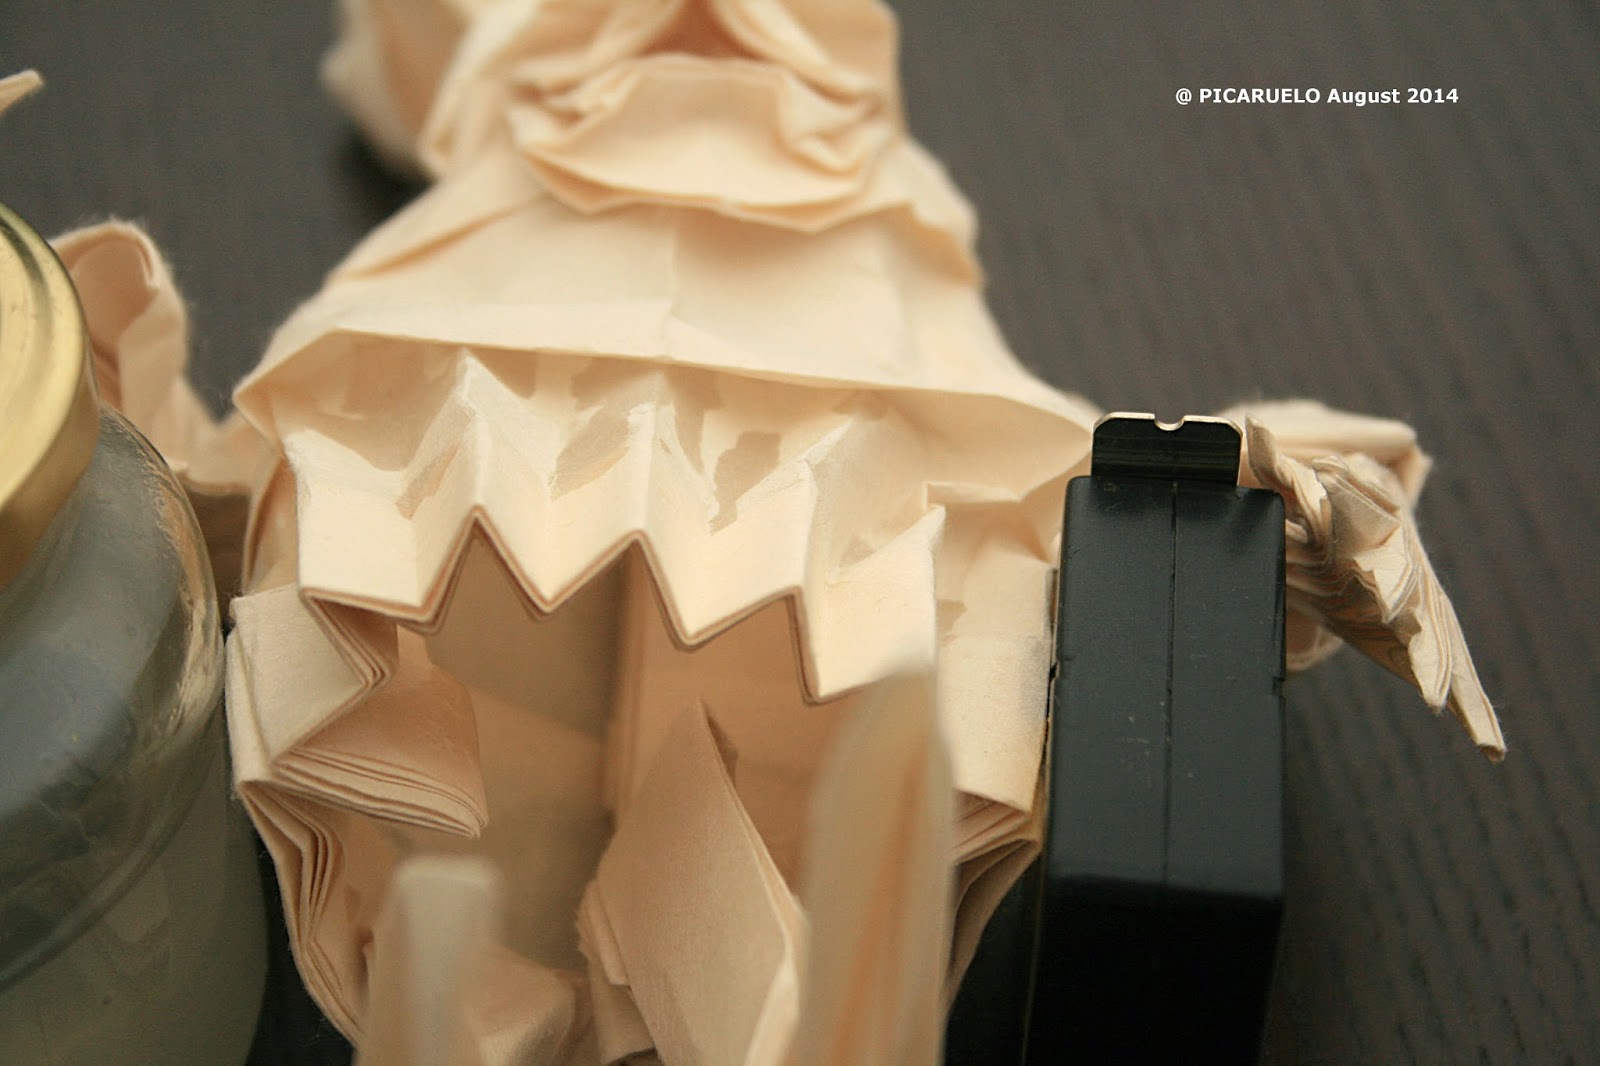
The only problem I found in Alexander's model was that it is back opened. As I have explained in other posts, my idea when folding these musicians was to make them completely three dimensional. Until now I had succeeded in all the models except in the violin that has an open back. However Alex's bass is relatively easy to close. As you can see in the upper photograph, the sides of the body have several layer of paper. It is simple to unfold and stretch them to form the flat back of the instrument. The only drawback is that the process shortens the legs but, who cares how long are those legs?

Let us see several pics of the process: 


And the model is completely closed:


Finally, I show a few photographs of the model from different points of view:

Face detail


Tuesday, 16 September 2014

CYMBAL PLAYER

The cymbal player is the sixth component in my music band. He is the first percussionist. You can see it here:


Up to now, this dwarf has been the easiest one in my collection. After folding five different models from five different bases this is the first repetition. The musician is very similar to the clarinetist in my band, it follows the same base and even beard, face and hat are similar:


The instrument, a couple of cymbals, was deduced and released by Ricardo Montecinos in his blog.

It is a very simple and easy to fold model. It should not take more than 5 to 10 minutes to collapse. However, giving it a good final touch is a little challenge. You have to be very careful to give it a circular form and the right curvature to the plate. In my case I used kozo paper painted with two layers of deep gold acrylic:


 As always I leave some pics of the model from different perspectives:


I folded this model during July 2014. I had a very tight schedule and I decided to make a few dwarves at the same time. The flute, bandoneon and cymbal players where folded in parallel. After collapsing the three bases I started the wet folding part. Fold the first part of the first model, put it to dry. Fold the second, put it to dry. Fold the third, put it to dry. When you finish with the third, the first one is already dry and you can start all over again.

The three bases just folded

The instruments where also folded in parallel. Here you can see them just before being put in the hands of their owners:


And finally, I want to show you some pics that were a little photographic innovation for me. The first one was made with reflected light coming from a LED lamp and with the background far from the dwarf. I got more contrast and a somehow more dramatic and cold atmosphere. The background, dark grey, adds up to that cold feeling.


The second photograph was made in the same conditions but using flash illumination. The dwarf becomes brighter and the light warmer.


As in origami, photography combines creativity and technique. Experimentation is as necessary in origami as in photography. Changing parameters as exposure, light direction, light source, depth of field absolutely changes the photo.

I am still thinking about how to build a simple, inexpensive and easy to set up photographic home studio.


Thursday, 28 August 2014

THE BANDONEONIST

'Wow, what a name!!!' you may have thought, THE BANDONEONIST. I discovered the name just a few days ago but after learning what it is I have come to love it. That is why I have chosen it as the title of this post.

The bandoneon is a kind of small accordion that was born in Germany. Later it was taken to the Rio de la Plata region in South America. From there, it spread all over the area, specially in Argentina and Uruguay. It has become a symbol of the tango. In this link from wikipedia you can read the history of this beautiful instrument.

I have used the bandoneon for the fifth music in my Jazz Band. Here he is:


He is a think, fatty, sad and angry faced dwarf. Maybe, the grumpy dwarf of the Band. Let us see his history:

It all starts in Zaragoza back in 2013, visiting the amazing Eric Joisel's Exhibition. There I discovered  the bandoneonist for the first time. The thing that really caught my eye was the instrument. The way the bellows are folded is simply astonishing. Take a look at Joisel's fold:.

Bandoneonist in Joisel's Exhibition in Zaragoza 2013

Coming to fold this model was very straightforward, specially compared with previous models. Both, dwarf and instrument CPs where published and available in Internet. For the dwarf, I used Ricardo Montecinos' 'Dwarf with Skirt' CP. You can find it in his web page. As in  my previous dwarves I have replaced Ricardo's CP head pattern with the 'tradicional' pattern to ease the collapsing process. The final CP I used is this:

Dwarf with Skirt CP
In the same web page, you can find a great photodiagram that helps to collapse the model.

For this dwarf I have used Kozo paper as always. The square is 65x65 cm, the largest possible size from the sheet of paper I had. You can see now some photos of the folding process:


Collapsed model
If you analyse the base you can see it is quite flat and wide. At this point you have start to model the body trying to make it more like a cylinder. In my case I also wanted to keep it wide so that the final appearance of the dwarf was a little bit fat.

Closing the back of the model is very straight forward if you have already folded the 'traditional' dwarf. It follows the same technique. You can see it in my post about THE CLARINETIST.
Back of the model once closed

Shaping the left side 
Together with the rounding process you can shape the skirt.


Finally you have to dampen the model and harden it with methylcellulose or carpenter's glue. Then you have to let it dry.

In the previous photograph you can see how the legs come from the back side. You have to fold them forward and strenghten them with glue so that they can support the weight of the model.

Some more modelling and it is done:


The instrument, a bandoneon, it a little origami jewel. A handmade CP draft was released by Joisel himself::

Later on, Ricardo Montecinos redrawed the CP with the computer. You can see it in his web page:
My investigation also took me to the wonderful "Setting the Crease" blog by Australian Peter Whitehouse (Wonko). It has more than 400 entries, most of them belonging to his wondrous 365 Project. He folded a different model every single day of the year 2011. And not easy ones, just hold your breath and take a look. In one of his entries he has a photodiagram on how to fold this model. It seems he also fell in love with it as I did.

I started from a 32x20 grid, kozo paper. Size of the paper 20x12,5 cm. I painted it with brown water colour. Here are some photos of the folding process:

The draft I made with the grid

First I precreased the CP except in the central area. There, I only precreased the horizontal and vertical lines. The triangles and diamonds are more easily folded later.

Detail of the collapsing of one of the horizontal lines in the middle of the CP and how you start to create the sides

The same point but from the inside

After collapsing the main body
We begin to precrease the lines that in the centre of the CP appear as triangles and diamonds. They will let us fold the bellows. After folding the horizontal lines in the CP the complex triangles and diamonds turn into easy to fold straight lines.

Precreasing the bellows

After precreasing the bellows
And now we begin with the most surprising and pleasant part, the bellows folding. They almost fold themselves once the creases are made
The belows almost fold themselves 

When the belows are made the model closes on itself

Finally we fold both sides

And we arrive to the finished model

The final model is not perfectly closed . We can help it with a little carpenter's glue or methylcellulose. The purists can try to close it simply with wet folding techniques. 

Detail of the handle
And in the end we place the bandoneon in its place between the dwarf's hands. As you can see I have added a few gilded dots around the sides of the model to make it more lively. They are painted with deep gold acrylic.

Bandoneon detail
Finally, a little origami lesson I learnt from Joisel seeing his models in the Zaragoza 2013 Exhibition.
Eric Joisel's hedgehog in Zaragoza 2013 Exhibition

Eric Joisel's snail in Zaragoza 2013 Exhibition
Both, hedgehog and snail, two amazing models use the same pattern than the bandoneon. The lesson is clear. Simple patterns, used once and again, to solve very complex and different problems.